


Landscapes
Capturing Autumn Colours in Ashford's Parks: A Seasonal Photography Guide
October 01, 2026
Autumn in Ashford arrives without much ceremony. One morning the horse chestnuts on the walk to the station are still green; a week later the path is ankle-deep in copper. For a photographer, that shift is the whole point — and also the problem, because colour this good never sits still while you fiddle with settings.
This guide is about making the most of the six weeks or so when Ashford’s parks, riverside paths and nearby woods are at their best. Nothing here requires expensive kit. A phone and a pair of walking shoes will get you a long way; a tripod, a polarising filter and a zoom will get you further.
First, Know When the Colour Arrives
Kent’s autumn colour builds through early October and usually peaks somewhere between the middle of October and the middle of November. That is a wide window, and the weather moves it around: a windy, wet spell strips trees early, while a run of cold, still nights and mild days holds colour longer and deepens it.
The useful detail is that different trees run on different clocks. Ash and field maple turn first, often while the oaks are still solidly green. Birch goes yellow. Larch turns butter-gold later than almost anything else, and beech holds its copper leaves longest, sometimes well into December.
So don’t plan one trip, plan three. An early visit for maple and birch, a middle visit for mixed woodland, a late one for beech and larch. The same park can give you three completely different sets of pictures.
Where to Go in and Around Ashford
You don’t have to travel far. The town’s green corridor along the Great Stour gives you water, mature trees and open sky within walking distance of the centre, and the countryside around Ashford adds woodland and heath within a short drive. A few reliable options:
- Victoria Park — central, sheltered and easy to reach on a lunch break, with mature trees and good paths to work along.
- The Ashford Green Corridor — the stretch of the Great Stour through town; riverside trees, reflections, and a completely different view in each direction you walk.
- Conningbrook Lakes Country Park — open water, reeds and big skies, better suited to wide autumn landscapes than close-ups.
- Singleton Lake — still mornings here give you mirror reflections and mist over the water.
- Godinton House and Gardens — formal grounds and old trees; check opening times and whether parts of the garden are ticketed before you set out.
- Hothfield Heathlands — birch, heather and open ground, a useful change from yet another woodland shot.
- King’s Wood near Challock — sweet chestnut and beech, with enough space for a proper walk.
Opening times, parking and access rules vary between sites and shift with the season, so check before you go — particularly at the managed gardens.
Exposing for Leaves That Don’t Look Muddy
Autumn colour is bright, and bright things are easy to lose. The commonest mistake is clipping the highlights: a backlit red leaf becomes an orange-white blob with no detail in it, and no amount of editing brings it back.
Your camera’s meter is usually the culprit. It assumes the world averages out to mid-grey. A frame full of glowing yellow leaves is far brighter than that, so the meter pulls the exposure down and your leaves come out dull and brown. The fix is simple: add exposure when the scene is bright, take it away when you are shooting dark trunks against a bright sky, and trust the histogram more than the screen.
A few habits that help:
- Watch the highlight warning (the “blinkies”). If large areas of leaf are blinking, back off a third of a stop at a time.
- Mind the red channel. Reds clip before greens and blues on most sensors, so a histogram that looks fine at the right edge can still hide blown reds.
- Shoot raw if you can. It buys you a stop or more of highlight recovery and lets you decide white balance later.
- Set white balance deliberately. Auto often turns shady woodland blue, which makes leaves look muddy purple. Daylight or shade presets are usually closer, and in shade you may still want to warm things slightly.
- Use a polarising filter. Turned to the right angle it cuts glare from wet leaves and adds saturation, and it removes reflections from water. Shoot roughly 90 degrees to the sun for the strongest effect.
Wet leaves also beat dry ones. After rain the colours are richer and the surfaces catch light. A bright overcast day is often the best autumn light of all, because nothing is too contrasty and the colour comes through evenly.
Composing a Seasonal Scene
A wide shot of “a tree in autumn” rarely works on its own. Something has to hold the frame together.
Look for contrast
A single yellow birch against dark conifers, a red maple over green grass, one bright leaf on a wet bench. Colour is most powerful when it has something to disagree with.
Build in layers
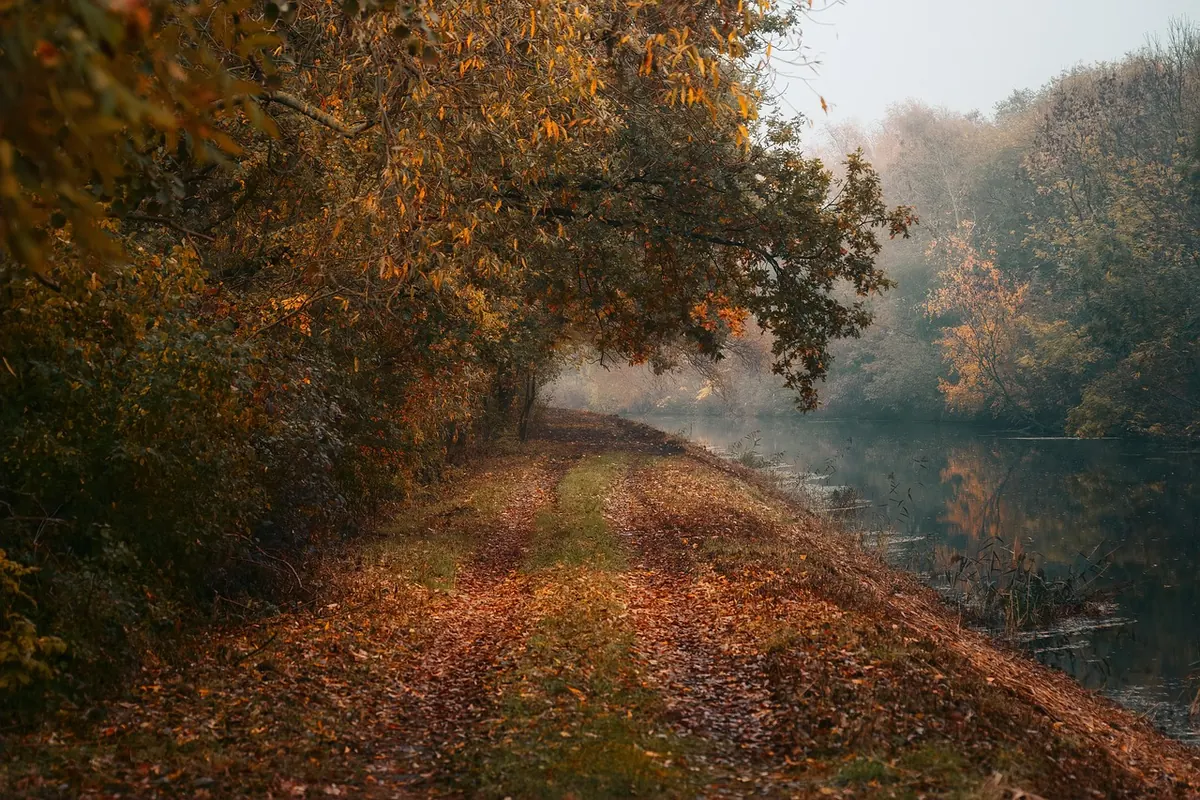
Leaves on the path at your feet, a curving path through the middle of the frame, tree crowns above. That layering is what makes a flat snapshot feel like a place you actually stood in.
Use what’s already there
Paths, fences, the river’s edge and rows of trees are natural leading lines. Shoot along them rather than across them. Reflections in the Great Stour or at Singleton Lake will double a line of trees for you.
Shoot into the light
Backlit leaves glow and show their veins. Shelter the front of the lens with your hand or a hood, expose for the brightest leaves, and let the shadowed trunks go dark.
Change your height
Most autumn photographs are taken standing up, looking slightly down. Kneel, sit in the leaves, or shoot up into the canopy with a wide lens. Ten minutes at a different height often beats an hour at eye level.
A Simple Field Routine
- The night before, check the wind as well as the rain. Wind destroys leaf detail faster than drizzle does.
- Arrive early. An hour either side of sunrise gives you mist on the lakes and soft, low light on the trunks.
- Start wide to get your bearings, then pick one tree or branch and work it for fifteen minutes instead of half-covering twenty.
- Check the histogram every few frames, not the back of the screen.
- Carry a microfibre cloth. Wet leaves and cold metal mean condensation, and cold drains batteries faster than you expect, so bring a spare.
- Leave the tripod in the bag until the light drops; in decent light it will only slow you down.
Make It a Season, Not a Day
Autumn colour is a moving target, and that is the pleasure of it. Go back to the same park a week later and the picture is different: different leaves, different light, different people walking the same path. Keep the kit light, keep your expectations loose, and stay on the paths where ground is soft or planted. A good photograph is worth waiting for; a trampled flowerbed never is.
Photo: jwvein / Pixabay
Related posts
More stories you’ll love reading